Monday, June 11, 2012

Garden Update - Peekin' Pods!

My last post was to assure everyone that I have my fair share of gardening oopsies and failures. Now on to the good stuff happening outside!

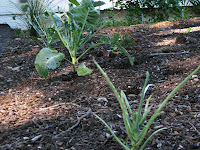
Of all the things we tried planting for the first time this year, the only ones that seem happy are the onions and eggplant. The eggplant seems to be doing well. Something's munching on the leaves but not as bad as on the cauliflower & brussel sprouts.

Eggplant - getting attacked by something
I have no idea what onion is supposed to do, or if I should have divided them, or when they're ready - but they look healthy to me.

Onion
I had better success than I expected with starting from seed. Granted, the season isn't over so I don't know if they will produce fruit - but so far they haven't withered and died! I mentioned in the last post that the rosemary never even sprouted and the radish were hit & miss, but the rest seems to be coming along. This year's seed starters included basil, carrots, cucumber, and garlic.

The basil seems to be doing pretty well. They're not big and bushy yet, as seedlings would have been, but they are definitely past the dying stage so I'm pretty sure we'll have a good amount of basil by the time the tomatoes start fruiting!

I have no idea what to look for in carrots. Here's the tops - they look good to me but as I found with radish, I won't really know until they're ready for harvest.

Carrot tops
The cucumber looks better every day. I'm not used to it being so small but it started from seed in May. I'm hoping it has a chance to develop fruit before it gets too hot for it to survive.

Cucumber looking happy!
The garlic has also been harvested already - and early. The general rule of thumb for garlic is to harvest on 4th of July, but the signs of readiness include completely died back tops. When we returned home from vacation, that's what we saw (except one plant that still had one lonely partially green blade, lol). We had a very warm winter, a sliver of spring, and summer-like weather since mid April. So I'm thinking it was just ready early this season. We haven't tried any yet since it's still curing but they look like the same stuff you'd get at the store so I think it turned out okay.

As of March Harvested May 25th
Finally, an update on the "typical" plants. They all look nice and healthy. I picked the first flowers off the tomatoes to encourage more plant growth. I've had a few people mention they've already had tomatoes from their gardens this season and I have to admit, I'm a bit jealous!

Tomato plants Pepper fruiting!
The peas have already come and gone. I started a second round at the end of April like like did last year, but it was too blasted hot and they are just hanging out at about 5-8 inches tall. I need to just go ahead and rip them out and feed the composting bin. I'm a little bummed about our shortened Spring.

The lettuce is doing great other than the one container getting munched on by whatever (deer?). The romaine and spinach both really took off.

More lettuce mix and Romaine Spinach
Overall, the flowers aren't going as well as I'd hoped but some are popping up and that's a plus in my book! The alyssum is flourishing like crazy! There's also snapdragons, nasturtium, and something else I haven't identified yet.

Snapdragon Unidentified, lol
View from corner
Blackberry Lily (perennial division from a friend last year)

Saturday, June 9, 2012

Garden Update - Oopsie Daisy!

Lest anyone reading this believe that I've got amazing gardening skills - this is a post with the not-so-successful attempts in our gardens. I'll have another post in a few days of the stuff that's growing well!

First off, here's what happens when you don't pull weeds for an entire Spring.

Top Right: Empress Wu Hosta
Bottom Right: Hosta
The rest: weeds!
An assortment of color and texture - weeds
We take good care of our weeds! Strawberry patch under netting, weed patch to its left
Those are some impressive weeds! Some of it's stinging nettle, which I honestly considered encouraging it to border the bed as a way to discourage Max from bothering the berries.

I'll start off the updates with the things we tried for the first time and seem to be failing at: cauliflower and brussel sprouts.

The brussel sprouts and cauliflower have been great food to something (Sweetie thinks it's deer). All that remains are the stems. They're pretty sad looking but I'm not pulling them until they're dead. I'm curious if the cauliflower head will still grow without the leaves, and if so then I'll just cover the head with the leaf of something else to protect it from the sun. I can already see the brussel sprouts forming in the forks so they're staying in the ground until they either produce fruit or die. I'm optimistic by nature :-)
Brussel sprouts - most of leaves
chewed off but the buds are there!
Cauliflower -
one naked, one almost there
This year, we also started stuff from seed for the first time. Of the things I planted seed for, rosemary was the only thing that never even sprouted. I've heard it's a finicky plant so I'm not terribly surprised about that.

The radish has already come and gone, and what did form into a radish was delicious. I don't know why, but it didn't occur to me that root vegetables should have the soil loosened as deep as I expect the edible root to grow. So about half of my radish crop didn't form bulbs, but more like fingers or yarn. I read how to prepare the leaves as a way to salvage something from this lesson but I never got around to it and the leaves turned to compost. Oh well.

The only radish picture I have past seedling stage
The lettuce is doing great, other than one container of lettuce mix that something is getting a good meal off of. Again, Sweetie thinks it's deer. She said she'd noticed tracks in the garden. I suppose that may also be what's eating the cauliflower and brussel sprouts.

What's left of the lettuce mix
Free dinner for the wildlife, only one of my charitable contributions!

The flowers aren't going as well as I'd hoped. The alyssum is flourishing like crazy but everything else is pretty lackluster! Out of the 30 or so snapdragons I planted, only 4 have turned into discernible plants. In the row of nasturtium, so far there are 3. Some other plants are growing, and they look like intentional plants, but I don't know what they are yet.

Snapdragon Unidentified, lol
View from corner

Thursday, June 7, 2012

Bathroom Renovations

Jules over at Pancakes & French Fries invites her readers every Thursday to share how they have lived according to the William Morris quote, “Have nothing in your houses that you do not know to be useful or believe to be beautiful.”

I usually resign myself to reading her always inspiring endeavors, and also click through most of the other readers who have linked up to her post. Then I say to myself, "I really should use this as a push to get some things looking nice (or simply fixed) around the house," to which my self replies by sitting on the couch.

So when sweetie suggested we take our first weekend with no plans to renovate the bathroom, I was glad to accept the push. Oh, plus it was gay pride week. So I guess we could say we were taking part in the festivities by gettin' our dyke on. Actually, we *did* say that - and then proceeded to laugh at ourselves. Anyway, I'll post progress photos below, but first let me give you an idea of how this seemingly simple project was anything but.

When we first moved in (2 years ago!) and were ripping wallpaper from the rest of the house, we had trouble in one room with the paper not coming off. We eventually used a paint roller to apply water to the walls and it bubbled right off. Excellent until we found out that they'd wallpapered directly over wallboard - no paint layer in between to protect the paper. Eek! That's a story for another day but it helps to illustrate how a seemingly straightforward project can go off the rails in this house.

It's suffice to say that when the nasty country-bumpkin border in the bathroom didn't seem to want to budge, we decided it could wait. Every now and then, one of us would get a spurt of motivation and start picking at it again. So after 2 years, we had a border in the bathroom that was glue residue with a few accents of paper residue. It was ugly. Every time I'd go into the bathroom, I would feel a heavy burden and loathing for the project that neither of us wanted to tackle.

Until now.

On Friday after getting home from work, we removed the imposing cabinet from above the toilet and then started scraping what we thought was wallpaper glue from the walls. Glue that's been steamed and dried many many times over the years. Two hours later and neither of us had gotten even a foot section done. That glue did NOT want to budge!

We used the water & fabric softener "trick" that's worked well for us in the past. It softened it just enough to dig into it - at which point I used a putty knife to get it into little balls that stuck to the wall. Then I used a sponge to wipe off the little balls. If this were normal, non-mutant glue the fabric softener would have worked like it has before because it would break down the glue starch but apparently this is special won't-come-off-in-steam bathroom glue from hell.

We tried some sort of store bought gel product that was no more help than the water. My next plan of attack was to use drywall screen sand paper (after the glue had dried from our other efforts) but was only successful in smoothing the glue, not sanding it off.

A little online forum searching resulted in a recommendation to use a heat gun (I have a hair dryer?) and trying to scrape it up while it's gummy hot. I didn't want to try it but Sweetie did while I was at the night job and said it softened the glue but then it had to be rubbed off with her fingers - like balling up rubber cement - and after about a 3-inch section of rubbing her fingers were raw so she stopped.

In the end, the most effective removal method I found was to use a V-notched trowel on the dried glue to get more manageable strips of glue rather than patches. Then I'd spray the glue stripes with a 50/50 solution of vinegar & water. Then I'd scrape the stripes with a putty knife and wipe clean with a sponge. Finally, I'd go over that section with the sanding screen to smooth out any leftover ridges. However, after using this method for about a foot-section each, Sweetie and I declared surrender and bought some oil-based primer and just covered it up. It's a border in a small room that we're in minimally throughout the day. We didn't care that it wasn't perfect, we just wanted it to be done!

Once we started painting, the project went on pretty smoothly.

Before During After

Before Cabinet removed! During After

Before After

Attempting to show the vanity detail tying into the wall color